
Better Button

Menu Navigation
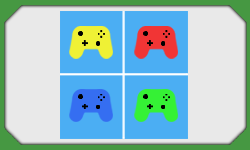
Controls Manager

Latest Release
Feb. 26, 2015
Version
1.0.0
Min. Unity
v4.6.1
Introduction
Better Button is an add-on asset for Unity's built in UI system.
Features
- Change button functions through code with ease!
- Add any parameter your function requires!
- Can be created through the GameObject menu!
To use BetterButton effectively, you should be comforatble with coding.
Getting Started
In order to use Better Button, you'll first need to add one to your scene. We recommend you use the GameObject menu (from the toolbar or by right-clicking in the scene hierarchy). Doing so this way will pre-set some of the settings for the Unity Button.
With the menu open, add the button by going to:
Create Other > BetterButton
BetterButton can also be found in the Component Menu under:
Component Menu > Boilerpowered > BetterButton
Below are the public variables that are available to you:
button.scriptWithMethod; // MonoBehaviour, the script that has the method
button.methodToInvoke; // string, the name of the method to invoke
button.methodParameters; // Array, parameters needed for your function, if necessary
button.IsInteractable; // bool, get/set whether the button can be used
button.uiButton; // gets the Unity Button from the gameObject
button.uiText; // gets the Unity Text that is a part of the button
The public functions thare are available are:
button.InvokeMethod() // Invokes the method in the specified script
button.UpdateInvoke() // Update the Unity button's listener
button.UpdateButtonImage( Image image ) // Change the button's image
And that's all you'll need in order to make Unity's Button that much better! We've also included a button in BetterButton's inspector that updates all the RectTransform components based on the button's image
To change the script with a method and the method to invoke, you could do something like this:
void SetButtonMethod( BetterButton button, MonoBehaviour script, string method )
{
if ( button != null )
{
button.scriptWithMethod = script;
button.methodToInvoke = method;
//This must be called whenever the script or method has changed
button.UpdateInvoke();
}
}
To change the text of the button:
button.uiText.text = "BetterButton";
To use methodParameters, we must first have a class that will hold the parameter. Let's say we want a string, so we create a class called StringParameter that contains the following:
public string text = "";
Once the class has been made and added to the methodParameters array, we can get the value of the parameter with a function like this:
public string GetString( object[] parameters, int index )
{
if ( parameters == null || parameters.Length == 0 )
return "";
return ( (StringParameter)parameters[index] ).text;
}
We can then use the above function to actually do something with the value of the parameter, like so:
public void UseParameter()
{
string test = "";
if ( button != null )
{
test = GetString( button.methodParameters, 0 );
}
//Do something with the string
}
Notes
- If you have any of our other packages, you will have duplicate scripts when adding this package to your project as there is some shared code between our packages. Simply remove the duplicate files and everything should be fine.

Latest Release
Mar. 3, 2015
Version
1.2.0
Min. Unity
Package: v4.5.4
Source Code: v3.4
Introduction
Menu Navigation is a transform-based navigation solution for custom menus in Unity3D. It's been created to make it easy to highlight menu items when using a controller or keyboard.
Features
- Multi-directional navigation
- Wrapping
- Inverted controls (if you're into that)
- Support to hide and skip over buttons
It is very easy to add and remove buttons to highlight but you'll need to be able to code in order to make the most of of Menu Navigation.
Getting Started
In order to start using Menu Navigation, you must add the component to a game object in your scene. You can find the component under:
Component Menu > Boilerpowered > MenuNavigation
After adding the component, you should make sure you've added set the Button Highlight field in the inspector. This is what will be displayed around your buttons.
To add buttons to Menu Navigation, you'll need to set up the rows and columns you want to navigate with. How you set this up depends on what you've set Direction to. If you plan to use Vertical or Horizontal, you only need one row with however many columns you wish. If you plan to use Both, you'll have to add multiple rows and each row needs to have it's own set of columns added to it.
To add/remove a row, use the plus or minus button next to the bold Rows text. To add/remove a column to a row, use the plus or minus button next to the row element's name, which looks like Row 0, for example.
All you are required to do at this point is to drag the transform of your buttons into each of the column fields.
As mentioned before, in order to make the most of Menu Navigation, you'll have to set what the position of the highlight will do in code. Below are the public variables that are always available to you:
nav.direction; // enum, set which direction to navigate in
nav.wrapHighlight; // bool, set whether to wrap the highlight
nav.invert; // bool, invert navigation controls
nav.canUse; // bool, set whether to update the highlight and get input
nav.ColumnIndex; // int, current column in a row
nav.RowIndex; // int, current row
nav.TableIndex; // int, unique index of a button in the array
nav.buttonPosition; // int, same as TableIndex
Before moving on, it's worth taking a moment to explain what TableIndex is. So let's say you have an array of buttons like below:
Legend: [row,column]
[0,0], [0,1], [0,2], [0,3], [0,4], [0,5]
[1,0], [1,1], [1,2], [1,3], [1,4], [1,5]
[2,0], [2,1], [2,2], [2,3], [2,4], [2,5]
What TableIndex does is determine a unique id for each button, from left to right, top to bottom. So the above array of buttons above looks like this with TableIndex:
0, 1, 2, 3, 4, 5
6, 7, 8, 9, 10, 11
12, 13, 14, 15, 16, 17
In order to have something happen when the highlight is at a particular index, we do something like this:
if ( nav.canUse && nav.buttonPosition == 0 )
{
    //Do something
}
If you want your "something" to happen, let's say, on a button press, you could put the above if statement inside of another one that is checking for when a button has been pressed.
Finally, to set a button to be skipped, it must be added to Removeable Buttons. To add/remove elements of the list, use the plus or minus button. Once you've added a new element, all you have to do is set the row and column indices in the Button to Remove field (X is the row index and Y is the column index). You can also specify if the button you are skipping should be skipped on only a particular Unity platform.
Note: For various reasons, we can't use TableIndex when setting which button to skip.
Notes
- While Unity 4.5.4 is required to import the Menu Navigation package, you can still use Menu Navigation in older versions of unity going back as far as v3.4. Just copy
MenuNavigation.csandObjectManager.csto the source folder of your project and everything should work.
Note: We can't guarantee that the editor script for Menu Navigation will work in older versions of Unity. Copy it over at your own risk. - If you have InControl (minimum of v1.3.7) and our Controls Manager package, Menu Navigation supports getting input from up to 4 players at a time or from one player in particular. To enable this functionaity, make sure you've added
CONTROLS_MANAGERtoScripting Define SymbolsinPlayer Settings > Other Settingsfor all platforms you plan to support. - If you are using Unity's default input, the default sensitivity for the
HorizontalandVerticalaxes is too low. They need to be increased for them to be effective. - If you are using Unity's built in GUI (pre-Unity 4.6), Menu Navigation supports it in a limited capacity. To enable it, add
UNITY_GUItoScripting Define SymbolsinPlayer Settings > Other Settingsfor each platform you plan to use it on. - If you have any of our other packages, you will have duplicate scripts when adding this package to your project as there is some shared code between our packages. Simply remove the duplicate files and everything should be fine.

Latest Release
Mar. 9, 2015
Version
1.1.0
Min. Unity
v4.5.4
Introduction
Controls Manager is a package meant to get you using InControl in your project faster. This means that having the our minimum required version of InControl is a requirement for using Controls Manager. Do not attempt to use Controls Manager without having InControl already added.
Features
- Easily accessible standarized controls
- Automatic player device assignment.
- Support for manually attaching/detaching devices.
- Bundled with 4 custom keyboard profiles to get you started.
As with InControl, you need to be comforatble with coding in order to make Controls Manager useful to you.
Getting Started
First of all, make sure you have the minimum required version of InControl in your project. After you've done that, add CONTROLS_MANAGER to Scripting Define Symbols in Player Settings > Other Settings for all platforms you plan to support.
Controls Manager is a singleton class. As such, it does not need to be added to a game object in your scene in order to use it. However, if you feel the need to add it to a gameObject in your scene, you can find it under:
Component Menu > Boilerpowered > Input > ControlsManager
Controls Manager is set up to inherit everything that we have implemented from a base class so that you will be able to add any project specific inputs you might want without having to worry about messing anything up in the base class.
This setup also allows you to use ControlsManager in a shared repository if you have a shared code base between projects.
Below are the public variables that are available to you in the base class:
controls.inControlManager; // InControlManager, component script from InControl in order to initialize InControl
controls.customProfilePrefix; // string, set the prefix of your custom profiles
controls.customProfiles; // List<string>, the name of your custom profiles
controls.AnyControllerConnected; // bool, true if more than 1 controller deivce is connected
controls.InControl; // gets inControlManager (or adds it if it isn't there)
controls.UseXInput; // bool, enabled XInput in InControl
controls.players; // List<PlayerControls>, list of players
Below are the public variables that are available to you in the ControlsManager class:
controls.player1; // PlayerControls, specific player from the list of players
controls.player2; // PlayerControls, specific player from the list of players
controls.player3; // PlayerControls, specific player from the list of players
controls.player4; // PlayerControls, specific player from the list of players
You'll notice that we only include 4 players by default. If you wish to add or remove players, use the plus or minus button next to Max Players in the inspector.
Controls Manager provides access to all standard inputs provided by InControl. They are accessed through each player's PlayerControls script. PlayerControls is also set up to inherit from a base class so, just like Controls Manager, you can add your own custom inputs without worrying about messing up the base class.
To check if any player has pressed a button, we do this in an Update function:
if ( ControlsManager.Instance.GetA1() )
{
    //Do something when any player uses Action1
}
To check if a particular player has pressed a button, we do this in an Update function:
if ( ControlsManager.Instance.player1.GetA1() )
{
    //Do something when player1 uses Action1
}
To check if a particular player is holding a button, we do this in an Update function:
if ( ControlsManager.Instance.player1.GetA1( true ) )
{
    //Do something when player1 holds Action1
}
To change a player's device:
//SetPlayerDevice requires the player and the device index
ControlsManager.Instance.SetPlayerDevice( ControlsManager.Instance.player2, 2 );
There should only be one instance of Controls Manager in your game. It has been set to be persistent across scene loads to prevent this issue.
Notes
- Controls Manager does not currently support InControl's Touch input. This is planned to come in a later update.
- If you have any of our other packages, you will have duplicate scripts when adding this package to your project as there is some shared code between our packages. Simply remove the duplicate files and everything should be fine.